Homemade Protein Bars Recipe
If you have ever found yourself staring at the back of a protein bar to find out how much protein and macronutrients you're getting with your sugar dose, then you'll know about the frustration it can cause looking for a protein bar without preservatives, hydrogenated oil and obviously sugar.
The answer is simple, make them yourself because you'll be surprised how easy it is and you will know exactly what you're eating. Your own homemade protein bars will be healthier and cheaper plus a good feeling about your own self-management. The following five simple steps will get you all the high quality protein bars you will need. If you experiment with different options each time you make a new batch, you'll soon become a protein bar master chef.
STEP 1:
Selecting a good protein powder for your protein bars is important because you are then adding flour which can be eaten without cooking. You should select one of the following types of flour: Almond flour, coconut flour, quinoa flour or oat flour.
STEP 2:
You then need to bind the raw flour you have selected with the powder you've chosen by using milk. You should use one of three different milks: cow's milk, coconut milk, and almond milk. If you really want to get creative you can add butter or nut butter to enhance the binding properties. You then mix it all together to make a dough substance that forms the batter which you'll use for bars.
STEP 3:
Shape the batter into bars. If the batter becomes out too moist or too sticky to easily mold, you just need to add a little coconut flour or the flour you mixed it with, or casein powder. You then mix it until you get the consistency you need to shape the protein bars. The batter needs to be able to dry out enough, is essential.
STEP 4:
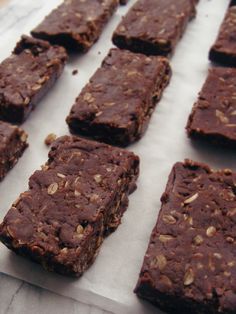
You should then melt half a slab of chocolate in a glass cup or bowl using a bain-marie or a pot boiling water. When you've got a jar of melted chocolate you then dunk your protein bars you've shaped into the chocolate, or pour the chocolate over the bars. The darker the chocolate the less sugar (calories).
STEP 5:
The last step is to take the chocolate covered protein bars you've created and put them in the freezer for about 30 minutes. Suddenly you're a master chef that's just created your own super healthy protein bars. BOOM!
For more information checkout Bodybuilding and Fitness Cookbook

FREE Muscle and Fitness Workouts
Lose Fat, Gain Muscle, Increase Endurance and Strength!
Enter your first name and a valid email address for instant access to the free workout program.